
Play Services Resolver
You need to download play services resolver for Android integration from the ConsoliAds Marketplace dashboard.
- Download the zip file of the latest version.
- Unzip the above downloaded zip file and find the unity package of play resolver.
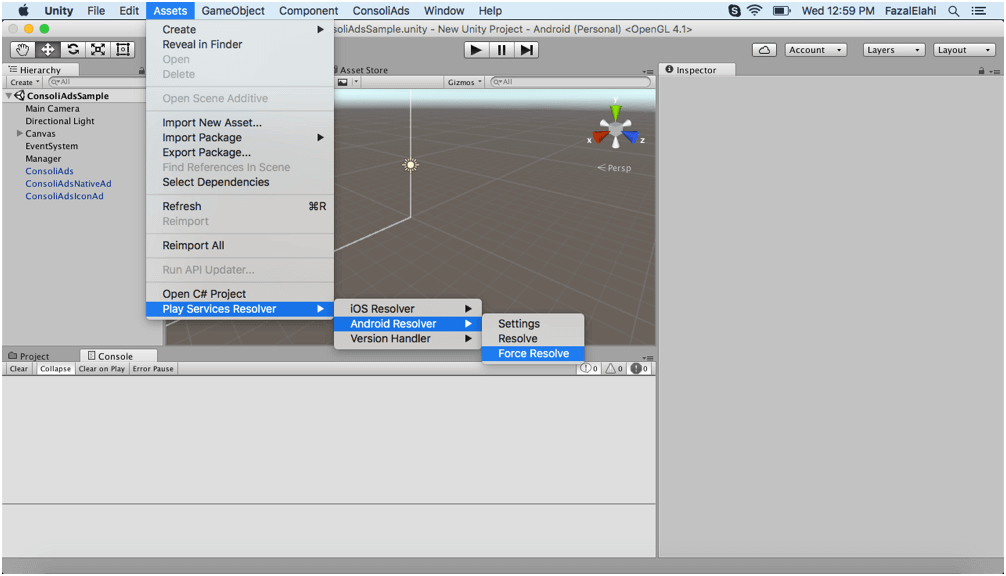
- Import it in your current project. It will automatically start downloading play services files. If it does not automatically start, then you need to resolve it yourself. Go to Menu->Assets->Play Services Resolver -> Force Resolve.
Resolver Settings for Unity 2018.x.x
- Go to Assets->Plugins->Android in a unity project and delete the file named
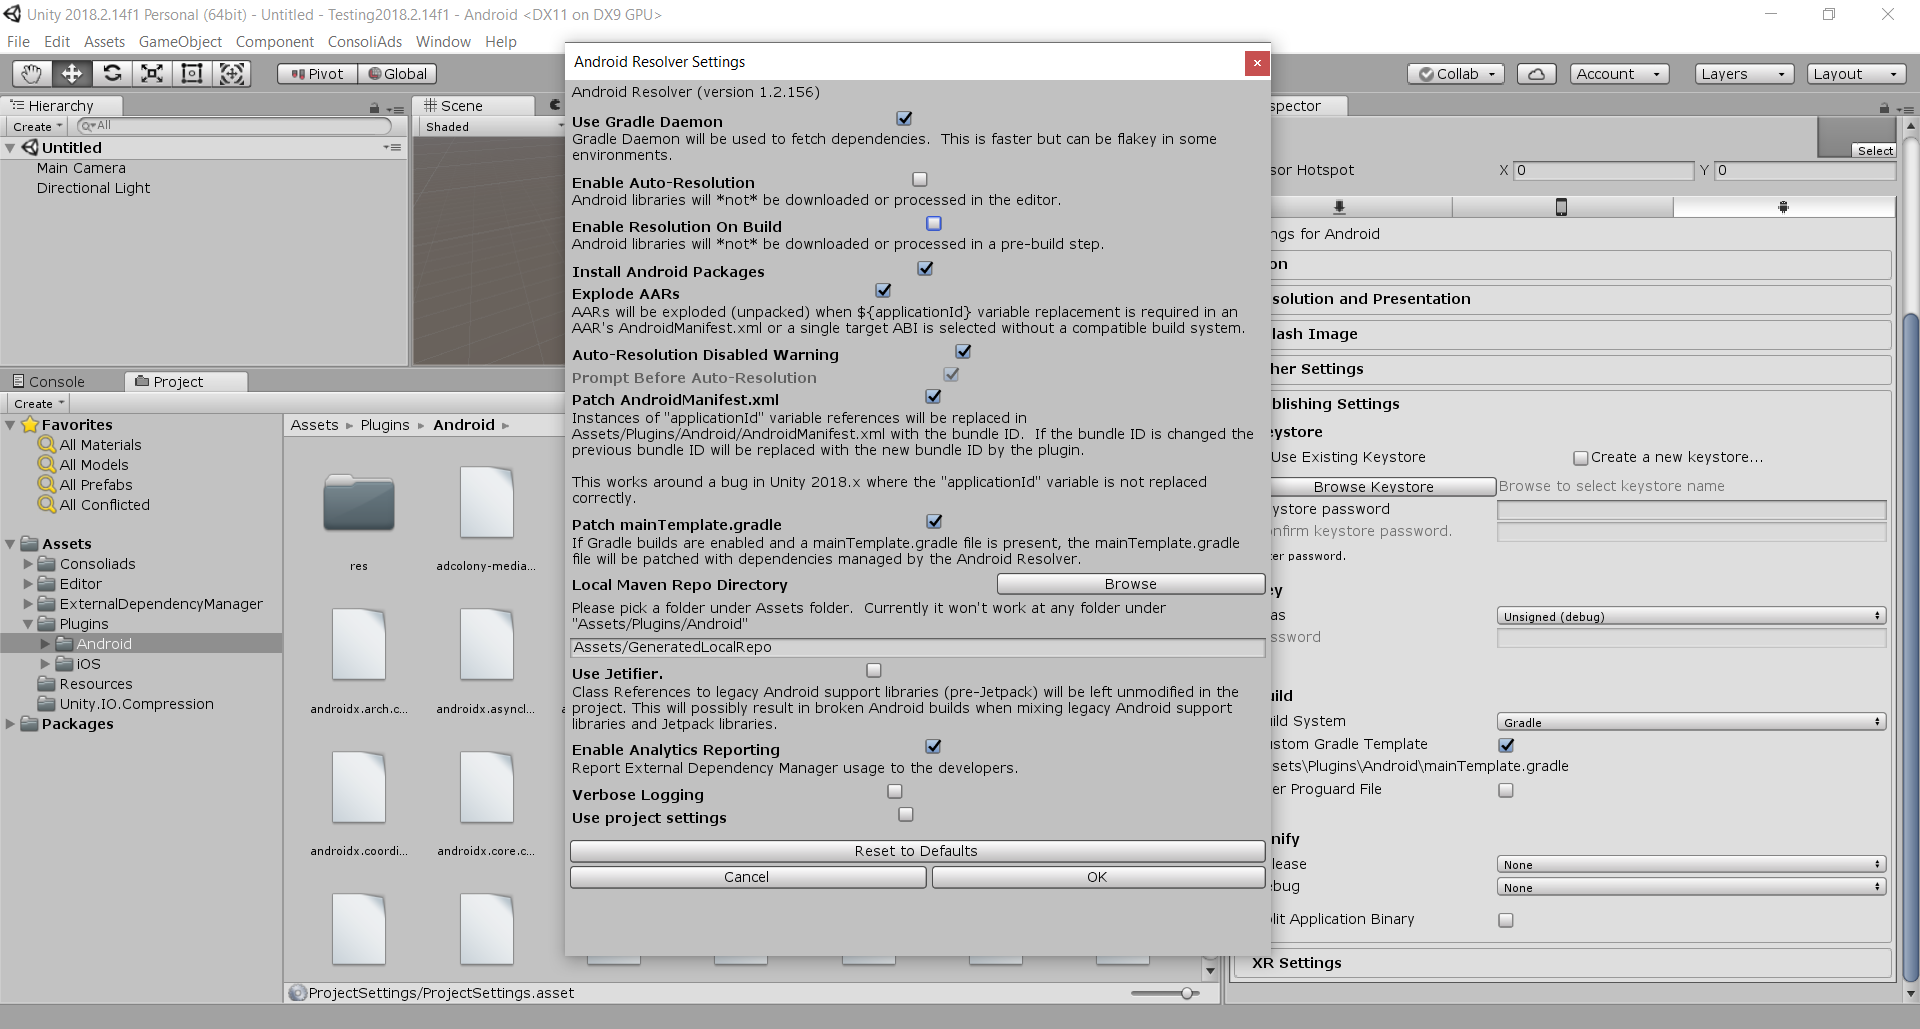
mainTemplate.gradle - Go to Menu->Assets->External Dependency Manager -> Android Resolver -> Settings.
- Apply Reset to Defaults in the resolver setting dialog.
- Required settings for play services resolver.
- Use Gradle Daemon should be checked
- Enable Auto-Resolution should be un-checked
- Enable Resolution On Build should be un-checked
AndroidX Support (Recommended)
To enable AndroidX support for your app:
- Go to your Play Service Resolver Android Settings and enable Jetifier.
- Your application will be required to have multi dex support when the Jetifier is enabled.
MultiDex Support
For Unity Editor 2018
- In your android build settings on Unity enable Custom Gradle Template
- Add the following attribute in the application tag of your Android Manifest
android:name="androidx.multidex.MultiDexApplication"
- In mainTemplate.gradle add the following in dependencies section
implementation 'androidx.multidex:multidex:2.0.1'
- In mainTemplate.gradle add in defaultConfig
multiDexEnabled true
For Unity Editor 2019 & above
- From Unity player setting enable the following
- Custom Main Manifest
- Custom Gradle Template
- Custom Launcher Gradle Template
- Custom Gradle Property Template
- Custom Base Gradle Template
- Add the following attribute in the application tag of your Android Manifest:
android:name="androidx.multidex.MultiDexApplication"
- In gradleTemplate.properties file add the following
android.useAndroidX=true
android.enableJetifier=true
- In the dependencies section of the launcherTemplate file, add the following:
implementation 'androidx.multidex:multidex:2.0.1'
- In the defaultConfig section of the launcherTemplate file, add the following:
multiDexEnabled true
- In the baseProjectTemplate file, change the classpath :
classpath 'com.android.tools.build:gradle:3.6.0'
** Congratulations, You are ready to build your app onto your android mobile device to see all the ad placements showing ads according to your Test Mode **
